


Be My Valentine
Valentines Day is this Friday (I will be spending it with 300 year 8 students on camp!) so I though I would try to show you a little something that you could whip up to pop in the kids lunch box or give as a ‘homemade’ treat to that someone special. It’s really easy and could be done in a day – or two if you need. This is the ‘How To’ for a Surprise Inside or Shape Inside cake; and as it’s Valentine’s Day I’ve gone with heart shapes…
You will need to think about your colour scheme. I went with a basic red and white but could have easily made pink hearts and red, white or chocolate cake surround. putting it into the fridge will firm it up, enabling you to cut it better later on. For this cake I used a loaf tin or bar tin, but you could easily use a square one.
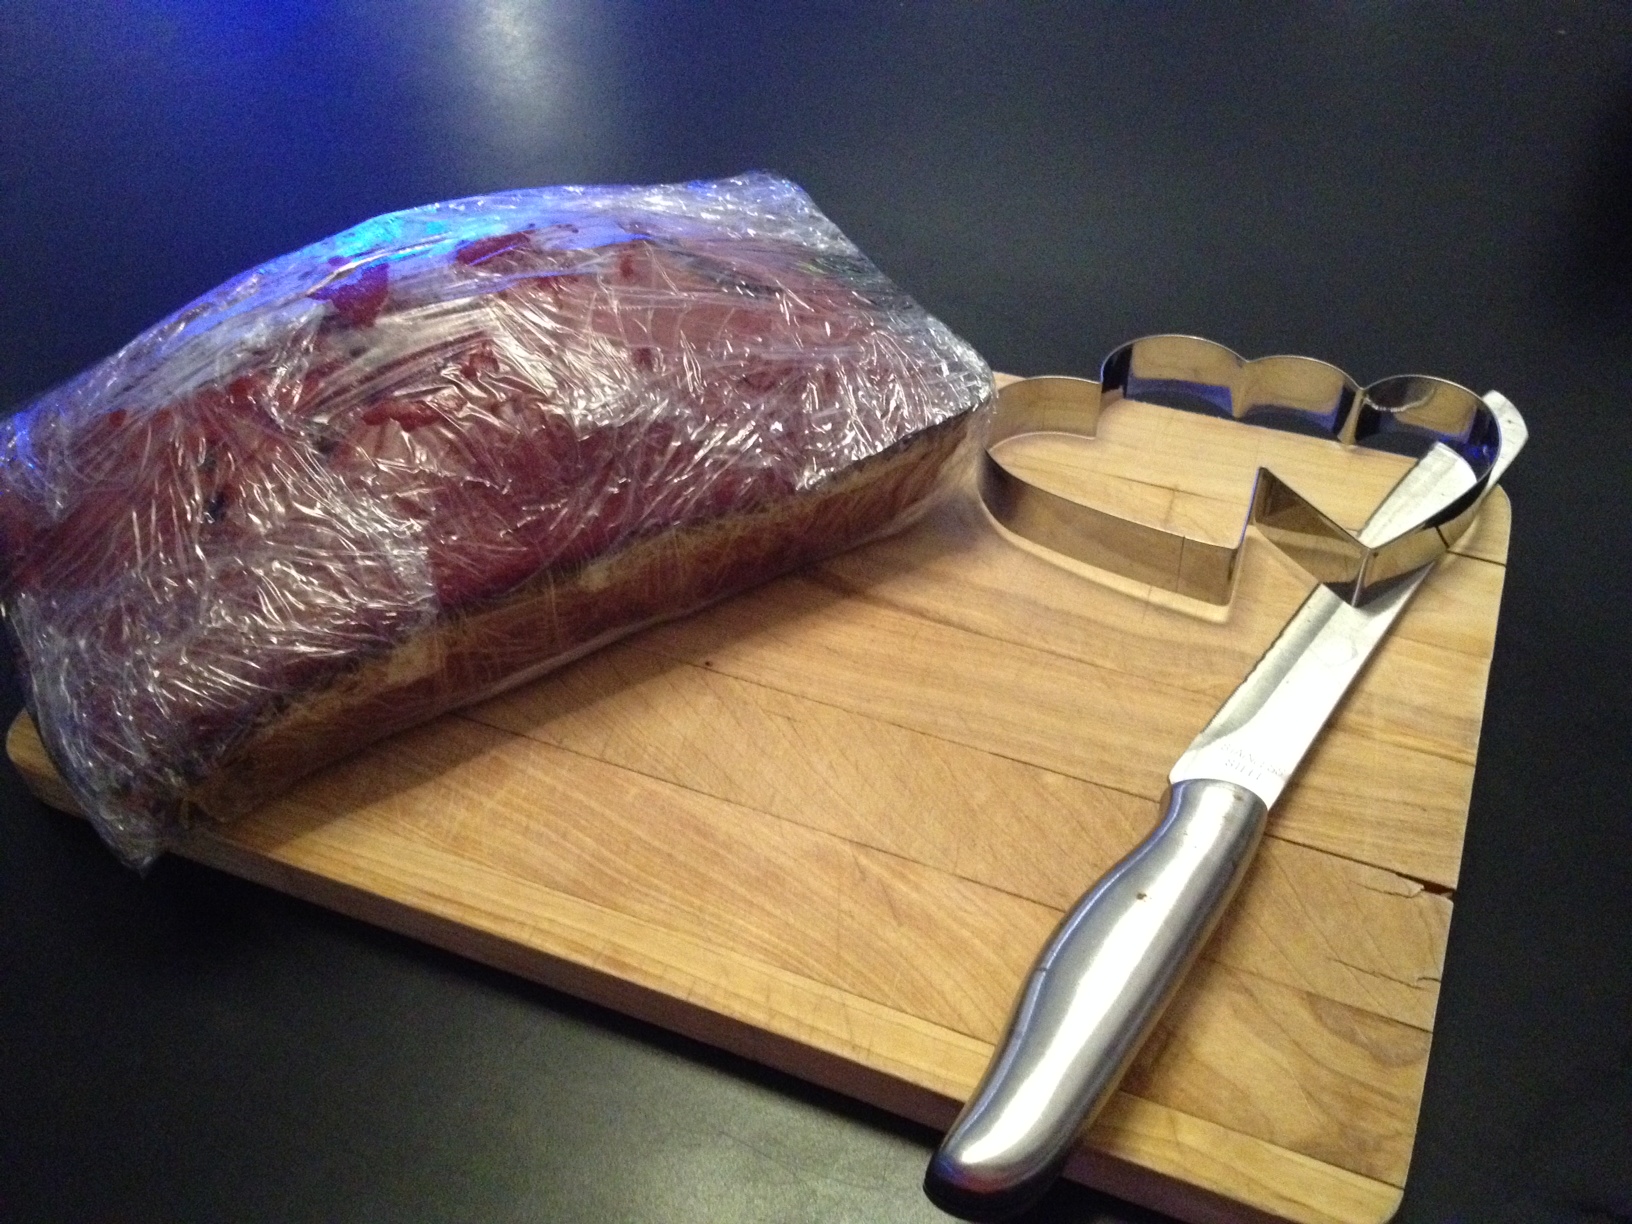
Once the cake has been in the fridge to firm up, check the size of your cookie cutter that will create the shape for the inside of you cake. In this picture you can see a double heart shaped cutter – it unfortunately was to big for my tin so I went with two smaller heart shapes.

Cut even slices, ready to punch out your shapes. Keep offcuts for cake pops.

As I said earlier, I went with two smaller separate heart shapes, but if your tin is big enough then a double heart shape that fills more of the width of the tin is ok too. Cut shapes out of every slice of your cake.

Line them up in the tin and make sure they fit the full length. Mine needed some adjusting being separate shapes (they even moved a little in the baking). Make sure you take them back out and grease/line the tin before you pour the next mix in.
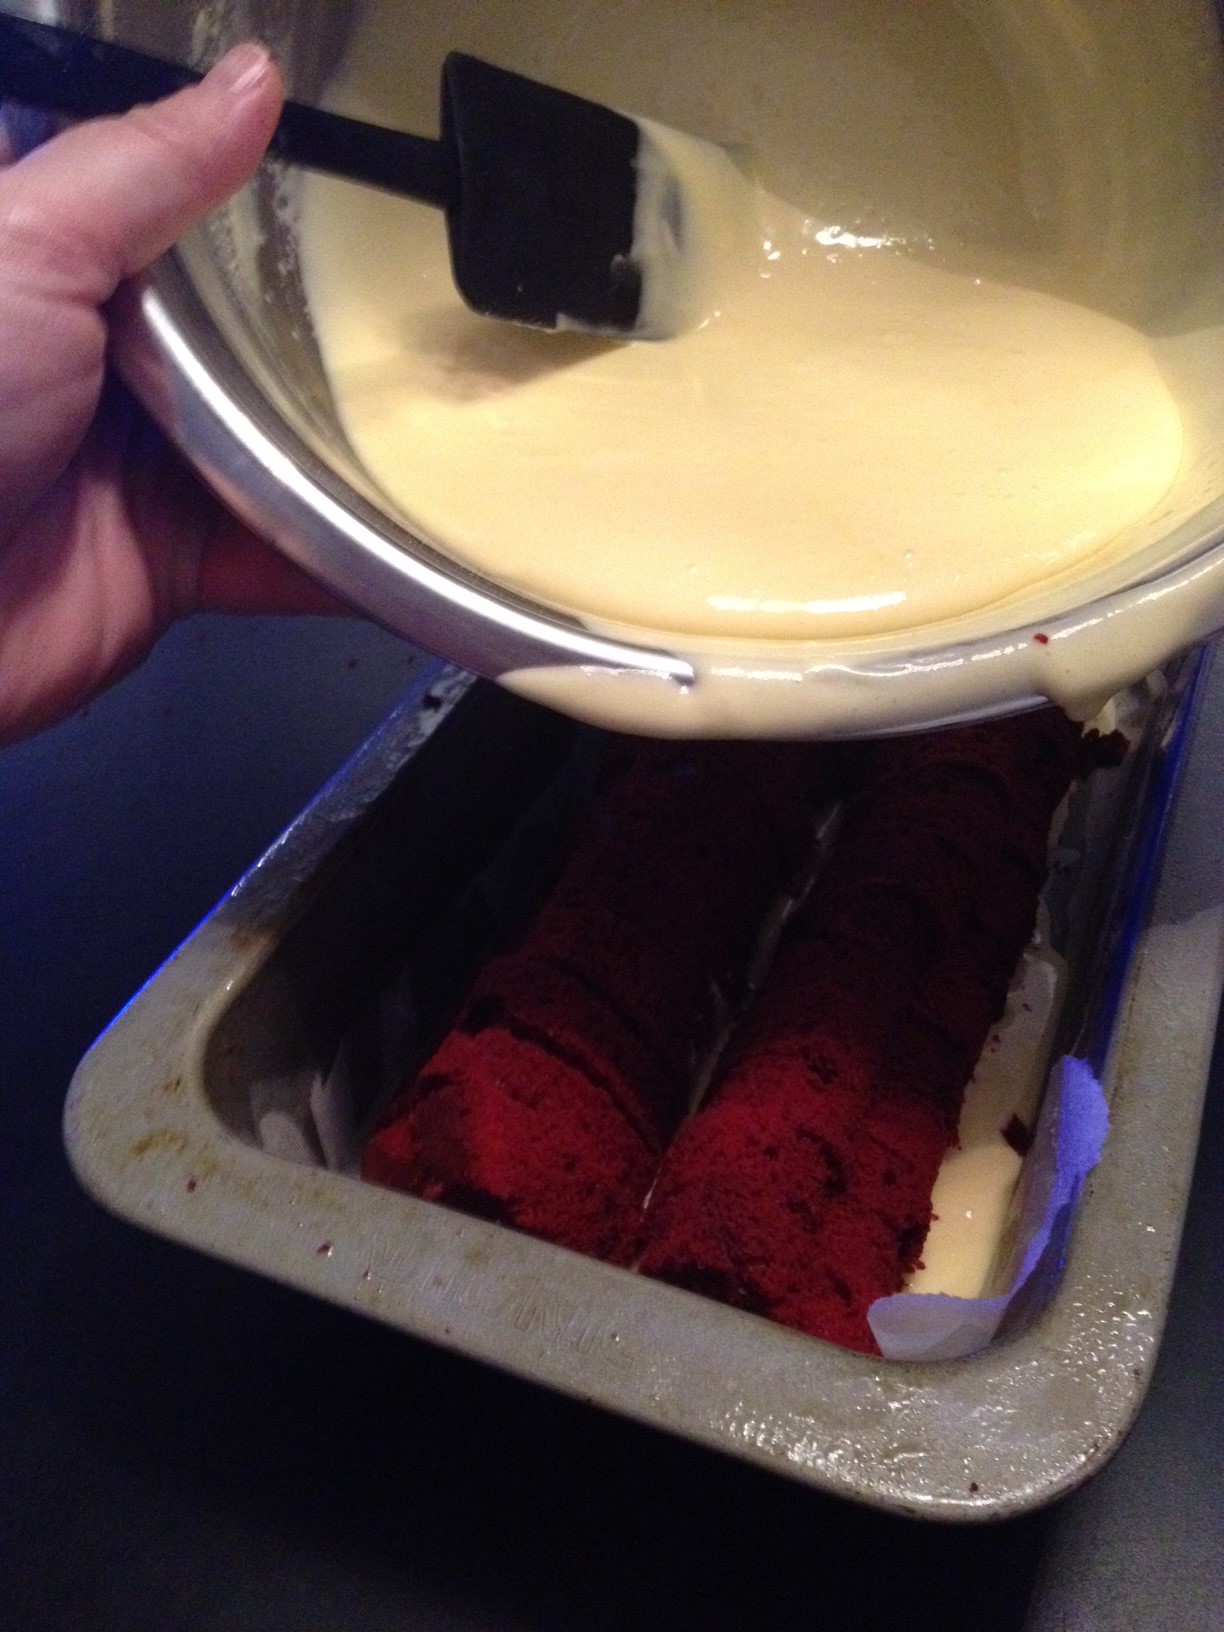
Make up the second batter (contrasting colours are good) and very gently pour over the shapes without moving them too much. I did a double sized batter to be sure to cover the cake shapes so they wouldn’t dry out in the second baking.
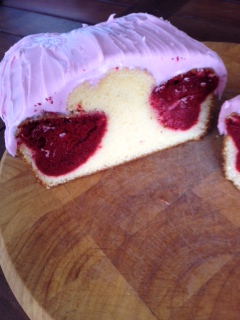
You can see how in the cake rising, the hearts moved (I think they look more like strawberries!) which is less likely to happen if your shape fills the tin better.

…but my cute little heart design runs right the way through my Valentine’s cake – wish I could be there to see my kids faces when they get a slice in their lunch box Friday.
Happy baking for your loved ones…and have a love-filled Valentine’s Day on Friday xx


Leave a Reply
Want to join the discussion?Feel free to contribute!