Hoot & Hootabelle Fondant Figures
After a number of requests for fondant figure building, I had a mother message me asking if I could do a post on making a fondant Hoot and/or Hootabelle…While the methods are the same no matter what figure, animal or creation you make in fondant I’ll post this blog; Hoot is so popular at the moment and I’m sure there are a few mum’s out there planning kids cakes as we blog. I’ll post another blog detailing different techniques and ideas for making human figures and other animals at a later date (hopefully when the renovating and move is over!)
Like any other cake decorating technique there are many ways of going about things and different tricks or tips people use that make it easier or stronger. There is no one particular way to do this. Find what works for you and take note of some of the tips that make it easier, faster or stronger when developing your characters.
First, allow plenty of time. I always make figures days, sometimes weeks ahead of the cake. This gives you plenty of room so that you don’t have to rush, time for repairing mistakes or breakages and drying time so it is sturdier when moving it or having it positioned atop a towering cake. It’s also a good idea to allow enough time to totally start over; if this is the first one you have ever made. It’s not difficult but it is always good to practice.
Gum Paste is best when modelling, but if you have already bought or coloured fondant for the desired character you can add a small pinch of GUM TRAG or TYLOSE powder to help it set and harden. As this will also dry out you fondant, moisten your hands and fondant with some Copha or shortening.
Before beginning to shape your fondant or gum paste, knead and soften it until it is pliable. This is when you can work in your Tylose powder and Copha if you are working with fondant. You can add Tylose to gum paste if it is too soft. It should be easy to manipulate, but not sticky; a texture like play dough. It may take a few minutes, especially getting the balance of tylose and copha right; take the time as it will make a big difference in the final look of your character/fondant figure.
*Too much tylose will mean that the fondant cracks or wrinkles. Too much copha will mean your fondant will be too sticky and very hard to work with.
Hoot and Hootabelle start with two ball shapes – for the body and head. They are sitting but shouldn’t look like they are sagging (fondant/gum paste too soft). I like to use a mix of tylose and water to make an edible glue. After moulding the shapes for your body and head, sit them on top of each other, position them, mould them and perfect the stance, then add the glue – you will only need a very minimal amount applied with a clean paint brush. If you find that it needs some more stability, you can stabilize the head/body with a toothpick or piece of dry spaghetti (always make sure they are removed before the figure is eaten/served they are an obvious choking hazard that can be easily forgotten).
I would then look at attaching the wings and tail – yes! Hoot and Hootabelle both have tails – so that the face doesn’t get in the way or damaged. They can be cut (with a template if you need) from a piece of fondant/gum paste that has been rolled out to a 1-1.5cm – tail might need to be thinner – thickness. Rub over the cut edges with your finger to smooth them out – anything that you can perfect before it’s attached is much easier to work with and the neater your work/finer your details the better your piece will look. Attach with a very light brush of the edible glue.
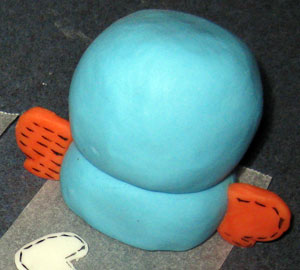
Hoot is an odd shape; his head is larger than his body. As you can see here the wings are also attached as mentioned; black ‘sewing’ details drawn on with an edible marker. Details will smudge; allow drying time or do them last.
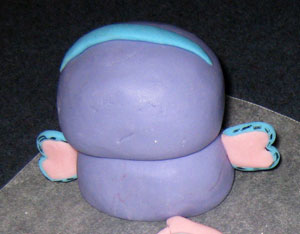
Hootabelle’s wings are two coloures. Check your images, I did them the wrong way around! Blue in the centre and pink around the edge. Cut the centre shape as you did with Hoot’s (insert dry spaghetti/ half toothpick) then roll thin coils and glue along the edge of each wing. Press lightly to adhere and flatten slightly. Draw ‘sewn’ details on.
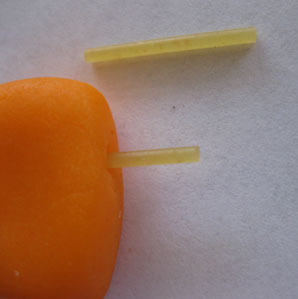
Insert dry spaghetti; only needs to be short, to help attatch fondant pieces together. You could also use toothpicks, skewers…depends on the size of the structure and the stability needed.
This wing could have the second piece inserted on the other side to balance the structure and attatchment.
Model the legs/feet and beak. Make two small indentations in the body with a balling tool then I would use the dry spaghetti or tooth pick trick with a light brush of edible glue to attach the legs in these indentations. You could attach the legs from under the body if you want – it’s entirely up to you how you design or arrange your character and its accessories.
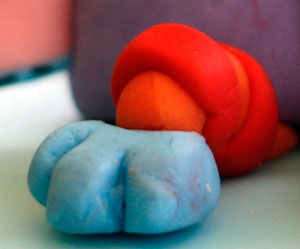
Hoot’s feet are the same orange as his legs. You can make them separate or all one piece – less joins the better. Hootabelle’s feet and legs are a lot more colourful and patterned. Each change in colour is obviously a different piece of modelled fondant. Wrap stripe detail around orange leg – or visa versa, and make blue foot; attach with glue and dry spaghetti – just like everything else.
There are two ways that you could make the eyes. Hoot/Hootabelle have very distinctive eyes. You could, like I did, cut the shape from a rolled out piece of fondant/gum paste or you could roll a coil (snake-like piece) from the fondant/gum paste and shape each eye individually by wrapping the coil around the white ball of the eye. This way has more pieces to fiddle with, but the solid eye shape will crack if you leave it too long and it dries before you attach it. Attach the eyes with glue and let then set before the beak is attached so that they don’t lean on it. The beak just needs a dab of the glue and hold it in place for a second or two – just in case it slides down – if you have too much trouble, make it smaller. Fit it between the eyes.
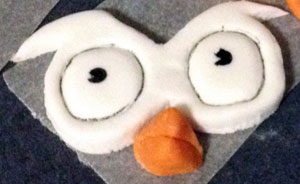
Cut from one piece of rolled out fondant, the detail in the eyes had been indented with a blunt tool and outlined with an edible marker pen. They weren’t covered with plastic and crusted over; when attached to the face they cracked slightly.
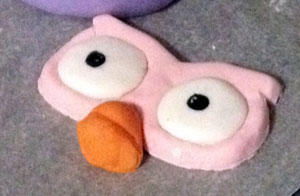
Cut from a rolled piece of fondant, the whites of the eye was added into the holes to set. Like the Hoot eyes, these dried out before they went on the face. They cracked and another set of eyes had to be made.
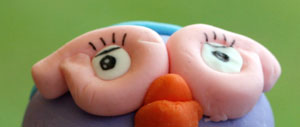
The second set of eyes were made where a coil of pink fondant was wrapped around the white ‘ball’ for the centre of the eye. I don’t think they are as well shaped, but it’s all personal taste. I think they were a bit too thick.
The only detail left is the heart shape on their tummies (and Hootabelle’s headband – if you are doing her). Like I’ve said a number of times there are a number of ways of doing the details. You can paint them on using food/gel colour, draw with more precision using an edible marker, make every little detail out of fondant/gum paste – do what you can, with what you have, as best as you can.
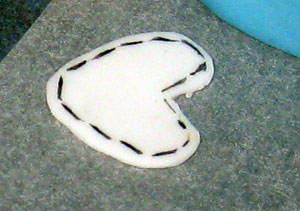
Keep details thin so they aren’t too heavy to attach. Deatils that are drawn on can be done first or last, just keep in mind; they smudge.
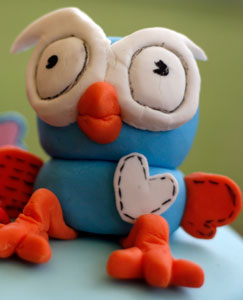
Hoot with legs attached from under the body; I’d change next time to having the legs attached from the front of the body with indentations and dry spaghetti. He still looks pretty good and is easily recognisable.
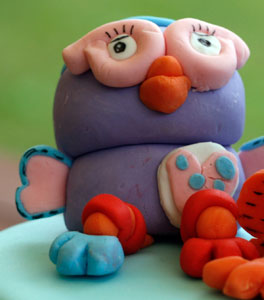
Hootaabelle; complete with headband and heart details and all the colours/patterns in the legs and feet.
Google ‘Hoot Cakes’ and have a look at different design ideas, different construction ideas and even all of the very different Hoot’s that are out there. Print out your favourite, it’s always good to have something to look at when you are creating…and happy modelling!




oh its time for me to attempt hoot and hootabelle fondant figures.. and as i will be following this blog step by step very carefully.. the pictures arent working… is it the blog or my computer?
Hi Mardi,
Thanks for the comment. I’ll have a look and email you. Best of luck with your figurines. x
Hi Sam
Awesome blog! I am going to attempt to make hoot for my nephews birthday. With the colouring… what colour paste should i use? Royal blue, sky blue etc?
Cheers
Mel
I have made Hoot a few times now. I’ve used Wilton Royal Blue (for the one in this blog) and also Americolor Electric Blue. Both give great Hoot colouring. Best of luck with your cake and be sure to share a pic on our a Facebook page, I’d love to see it. Sam @ ColouredSugar