Vrooom…30!
Another attempt at a 3D sculpted cake – only my second actually. This one was for my brothers 30th. He’s one of those guys that really doesn’t have a passion for a particular sport or hobby, so the theme was a hard to come up with. Once we decided on the racing car idea; how was it going to be done? A round cake…square cake?… fondant car-shapes cut out and stuck around the outside of the cake or three dimensional and sitting on top? Coming up with the theme is hard, but I find that once the theme is set I usually have too many ideas to work with – so I list them out or sketch them so I can see what works…
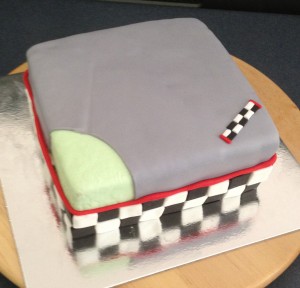
The Bottom Tier – A square cake with black and white chequered flag pattern and track.
This was a little tricky as it wasn’t just one piece of fondant covering the cake. There were a few colours and designs to achieve the look I was after. I could have covered the cake completely in grey and attached the other pieces on top, but that would have made a really thick, un-palatable layer of fondant – not really nice to eat. I rolled and cut the grey and green as separate pieces with a slight overlap and attached them to the ganaché layer of the cake. The black and white chequered pattern around the edge of the cake – cut with a small square shaped cutter to keep the size even – was also attached directly to the ganaché layer, but in hindsight I wished I had continued the green and grey pieces right to the bottom of the cake as it would have made attaching the small squares easier. The red roll finishes off and frames the edges of the chequered pattern and adds the racing car red colour to the bottom tier – multipurpose.
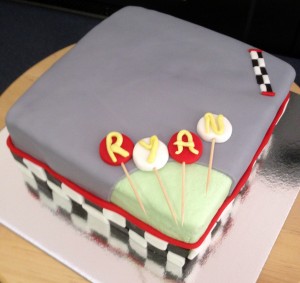
As an added feature his name was to stand along the track like signage. They were set on toothpicks to dry before being added.
Top Tier – Sculpted 3D Race Car
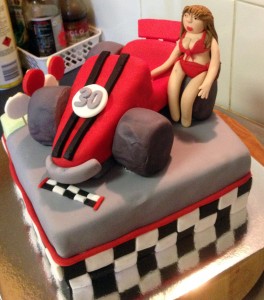
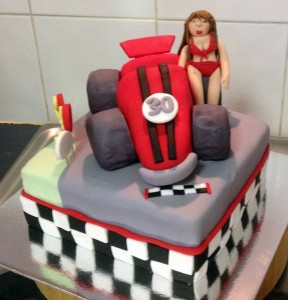
To have a cake big enough to cut out all of the shapes needed for the race car, I baked a large cake in a lamington tin. I used an A3 piece of paper to trace the shape of the lamington tin so that I could pre-draw the shapes needed to build the car. This way I could perfect them and place them to get the best use of the cake with less wastage (better to waste a piece of paper than to bake a 2nd cake). There was a car body shape, 4 wheels, a rectangle that later would be cut in half to create the height/windscreen and a long strip to support the vehicle from underneath. I cut them out of paper once I was happy with the size and shape, so all I needed to do was place them on top of the cake and cut around them. Each piece was covered in ganaché, then in fondant (make sure there is enough drying/setting time) before being pieced together to create the car. I could’ve used skewers or dry spaghetti to pin the pieces together, but as someone else would be serving it, I just used fondant glue – and it held. Details like pin stripes, numbers, name, rear spoiler and a fondant bikini girl were added to complete the look.
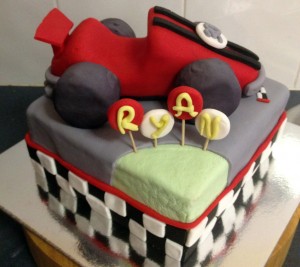
Two tiers complete and together. You can see rear spoiler and bumpers/exhaust added in fondant on the car.




Leave a Reply
Want to join the discussion?Feel free to contribute!