3D Cakes – Guest Blog by Claudine Ball
I’m Claudine, a novice cake decorator like Sam, who has had an obsession with baking and decorating cakes for over 15 years now. My obsession started slow with doing our family Christmas cake at age 16 – to now doing friends and family’s special occasion cakes.
My first 3D novelty cake was for my daughters 2nd birthday, we had planned a teddy bears picnic in the park so I wanted a teddy bear cake. I searched the internet weeks before the party to make a plan on how to do this cake 100% edible. I was very close to buying a Wilton teddy bear 3D cake tin but I couldn’t stomach the exorbitant shipping charge from the US.
I finally decided if I was going to do this there had to be another way using the simple baking equipment I had at home. This is when I came across using “Rice Crispy Treats” as another way to form/carve the detail in your cakes.
Since this cake I have now done 5 novelty cakes using the rice crispy recipe to form added details. I love it as it very light and easy to work with, the size and shapes you can make are endless.
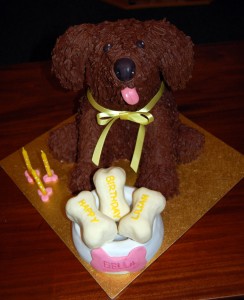
This is the latest 3D cake ‘Bella’; made with White chocolate mud cake, chocolate butter cream icing and rice crispy treats.
Bella
No 3D cake is made without first having a plan of attack. “Bella” was requested from another 3D cake I had made of a dog, but all are started from the original base I did for the Teddy Bear.
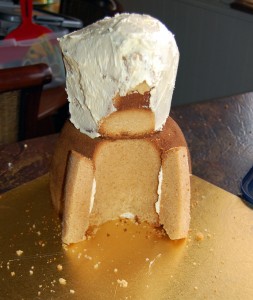
I baked the cakes in 2 different sized pudding bowls which you will need approx 1-1/2 x recipe for a 9inch round cake mix. You will also need 2 x amount of butter cream.
Make your rice crispy treats before assembling your cake as I have found the cooler (NOT COLD) the mixture is the easier it is to sculpt. Please remember that this is like napalm when first made and will stick to everything not to mention very, very, very hot !!
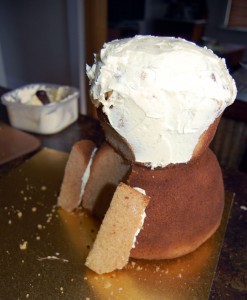
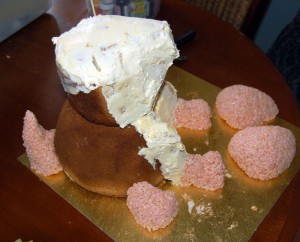
Using some butter cream as a glue, anchor the cake on your board, Shave and cut off small amounts of cake to form the shape required. Any excess cake removed can be used to form other elements in your design.
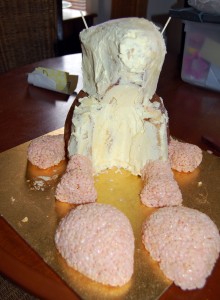
Once the cake has been formed it is time to sculpt your Rice Crispy Treats (RCT) into the desired elements. For this cake I needed paws, ears, tail and snout. Using your hands mould and compress RCT into your desired shape, make sure to compact it well leaving no air pockets. You can use a knife to indent any features like toes, you can also carve or cut out (use cookie cutters) RCT once it has hardened. Leave them to go cold (hard) if you require extra stability (especially in hot and humid weather) you can coat the RCT shapes with white chocolate to prevent any stretching under weight of the icing.
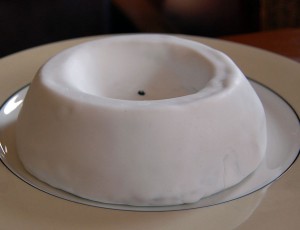
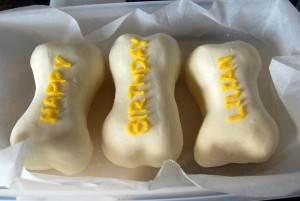
Once you have all the RCT pieces in place start Icing your cake. Apart from 2 structurial supports this cake was 100% edible. The bowl was carved then covered with butter cream then ready to roll (RTR) fondant to get a smooth porcelain like finish. The bones where cut to shape using a cookie cutter then I added small RCT balls to give a 3D look and covered in white chocolate, once the chocolate was set I scraped the outside with a butter knife to give it more of a bone look.
Five Tips When Using RCT:
- Don’t start sculpting until the mixture has cooled
- Make sure you compress all the air out of the shapes/designs
- Use chocolate to stabilise your shapes in hot/humid weather
- RCT can be stored and premade up to week before needed (without icing)
- You can reheat the mixture to make it pliable again
by Claudine Ball from Caked In Sugar
Rice Crispy Treats Recipe (also available as a printable recipe card here)
1 x 250g bag Marshmallows
5 x cups Rice Bubbles
1 x tablespoon Butter
Melt 1-2 tablespoons of butter in a large bowl.
Add marshmallows and toss to coat.
Microwave for 45 secs, stir and microwave another 45 secs and stir.
Microwave another 10-15 secs if necessary to fully melt the marshmallows.
Remove bowl and add the rice bubbles and mix well it will be sticky and stringy
Leave to cool for 10mins before handling.
NOTE: The hotter the marshmallows are the harder the rice crispies will be, it is better to microwave longer than necessary




Leave a Reply
Want to join the discussion?Feel free to contribute!